Settings
Request Expiry
If a call for help request goes unanswered for an extended period of time it is unlikely that the customer is still waiting. These requests represent a failure to help a customer. They should be archived, because they contribute to important metrics, but we want to remove them from the list of active notifications so they don't create a bunch of noise for associates. How long a call for help request can remain active is up to you.
To set the request expiry timeout:
- Sign into MyStore.
- Select Call for Help.
- Select Settings.
- Scroll down to Request Expiry.
- Select the number of minutes to allow a call for help request to remain active.
- Click Save.
Escalations
Escalations allow managers and supervisors to receive notifications when call for help requests are not claimed in a timely manner by associates.
To enable escalations:
- Sign into MyStore.
- Select Call for Help.
- Select Settings.
- Scroll down to Escalation Notifications.
- Check the Send escalation notifications checkbox.
- Select the number of minutes to allow a call for help request to go unclaimed before triggering an escalation.
- Click Save.
Repeating Alerts
Repeating alerts provide a way to send recurring reminders for unresolved call for help requests and escalations.
Repeating alerts are only supported for prompts with the Staff Action set to Claim & On the Way or On the Way.
Repeating alerts are not supported as radio announcements.
To enable repeating alerts:
- Sign into MyStore.
- Select Call for Help.
- Select Settings.
- Scroll down to Repeating Alerts.
- Check the Enable Repeating Alert checkbox to send recurring reminders for unresolved call for help requests.
- Check the Enable Escalation Repeating Alert checkbox to send recurring reminders for unresolved call for help escalations.
- Set the Alert Capacity to the maximum number of minutes that the repeating alerts should to continue to be sent.
- Set the Alert Interval for Unclaimed Requests to the desired interval to send alerts for unclaimed requests.
- Set the Alert Interval for Unacknowledged On the Way Requests to the desired interval to send alerts for requests that are claimed but not yet marked as on the way.
- Click Save.
Channels
Channels determine where call for help requests are routed.
Defaults:
- Default Call for Help Channel: The default channel for all call for help requests.
- Default Management Channel: The default channel for all call for help escalations.
Each call button or display you create can override these default channels.
Prompts
Prompts are simple sentences that provide context to a call for help request. These prompts assist both the customer and the associate.
For call buttons, the a prompt is only a message to the associate. It provides a sentence describing what the call for help request is related to. This message appears in the Microsoft Teams channel (or selected notification channel).
For digital call buttons, where the customer interacts with a web interface, the prompts provide choices for the customer so that they can communicate what type of help they are looking for. The customer's choice appears in the Microsoft Teams channel.
A prompt can be saved to an individual store location, or it can be saved to the organization for use in all store locations. For example, the following prompts are general and can apply to many stores:
- I would like to speak to a manager.
- I need help with a locking showcase.
- I need help finding a size.
- I would like to report a cleanliness issue. The following prompts may be quite specific and only apply to one store location:
- Need assistance with live bait.
Staff Actions
Prompts also define the action buttons presented to your staff. There are several options and which one you select depends on how your Call for Help Call Button or Display is deployed.
- Claim & On the Way
- Staff see separate Claim and On the Way buttons.
- The customer receives status updates when each of these buttons are pressed.
- This is the default option.
- On the Way
- Staff see a single On the Way button.
- The customer receives a status update when this button is pressed.
- Acknowledge
- Staff see a single Acknowledge button.
- This option is often useful for IoT sensor use cases, like a door sensor, where staff don't need to claim or go to the location, but someone does need to acknowledge that they have seen the alert.
- Done
- Staff see a single Done button.
- This option is often useful in staff-facing scenarios where the request represents a task, like collecting shopping carts.
- None
- Staff do not see any buttons.
- This option is often useful for IoT sensor use cases, like a door sensor, where staff don't need to take any actions, but you do want the event recorded.
Create Prompts
To create a new prompt:
- Sign into MyStore.
- Select Call for Help.
- Select Settings.
- Scroll down to Call for Help Prompts.
- Click the + button
- Check the Save Option to Organization checkbox if you want to make this prompt available to all stores in your organization, otherwise it will only be available to the current store location.
- Provide the text (Customer Text) that will appear for the customer on digital call buttons.
- Provide the text (Staff Prompt) that will appear on the notification presented to staff.
- Select the buttons (Staff Actions) that you want to appear on the notification presented to staff.
- Click Create Display Option.
Displays
See Digital Call Buttons.
Outcomes
Outcomes are simple options presented to store associates to have them indicate how a call for help request was completed.
After the associate indicates they are on the way to help a customer the interface updates to show radio buttons listing the configured outcome options.
If no outcomes are configured, the associate will still have the option to mark a call for help as Complete, but they won't be prompted to select an outcome.
Create Outcomes
To create a new outcome:
- Sign into MyStore.
- Select Call for Help.
- Select Settings.
- Scroll down to Call for Help Outcomes.
- Click the + button
- Provide the text that will appear for the associate.
- Click Create Outcome.
- Repeat as needed to create the desired list of outcomes.
You can click and drag to update the presentation order of the outcomes.
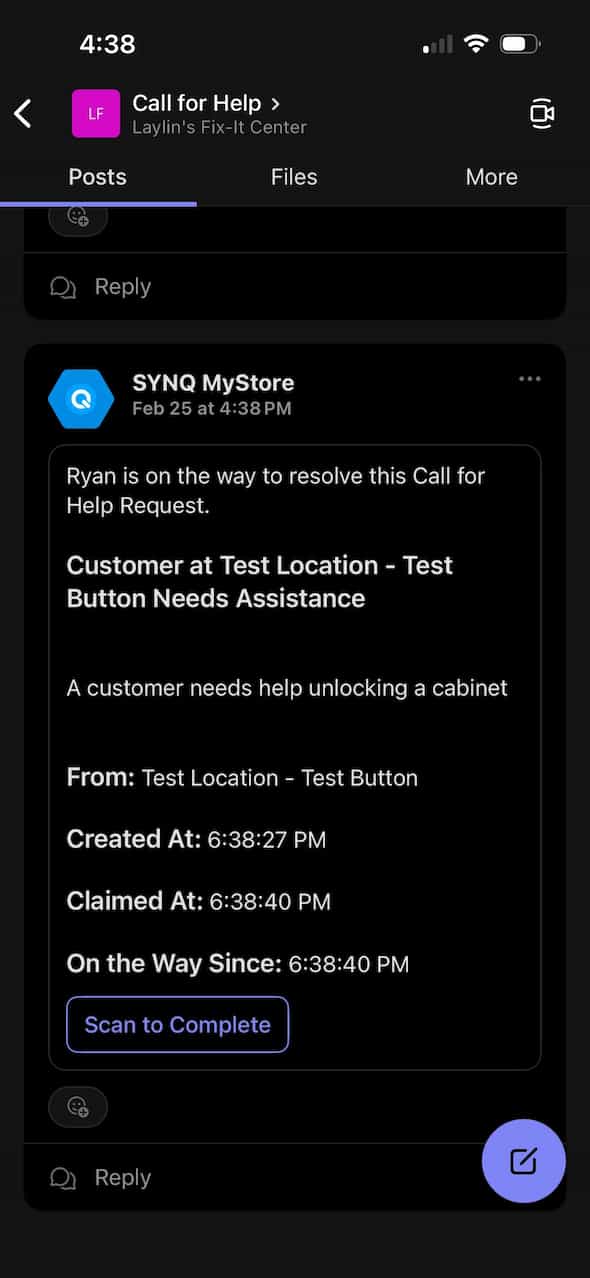
Scan to Complete
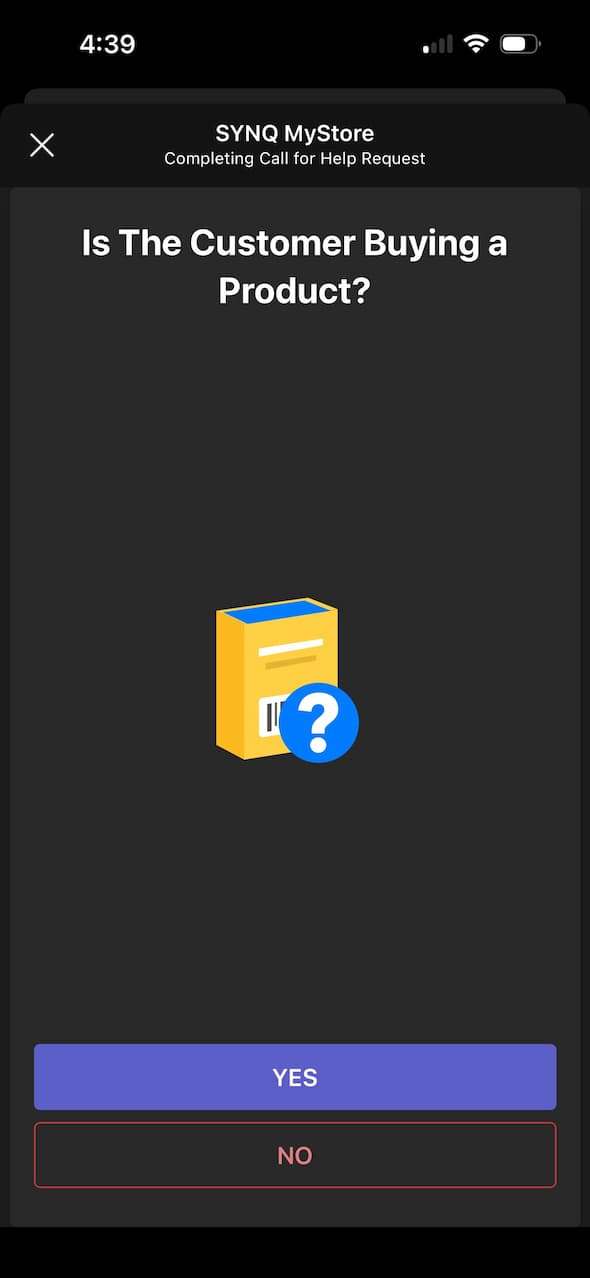
Scan to Complete is an optional flow that replaces explicitly defined outcomes. Instead it prompts the user to scan a barcode on the button that call for help request came from. Scanning the button requires the associate to visit the physical location of the call button.
Scan to complete also improves the overall data captured for help requests because it provides accurate times of arrival of associates.
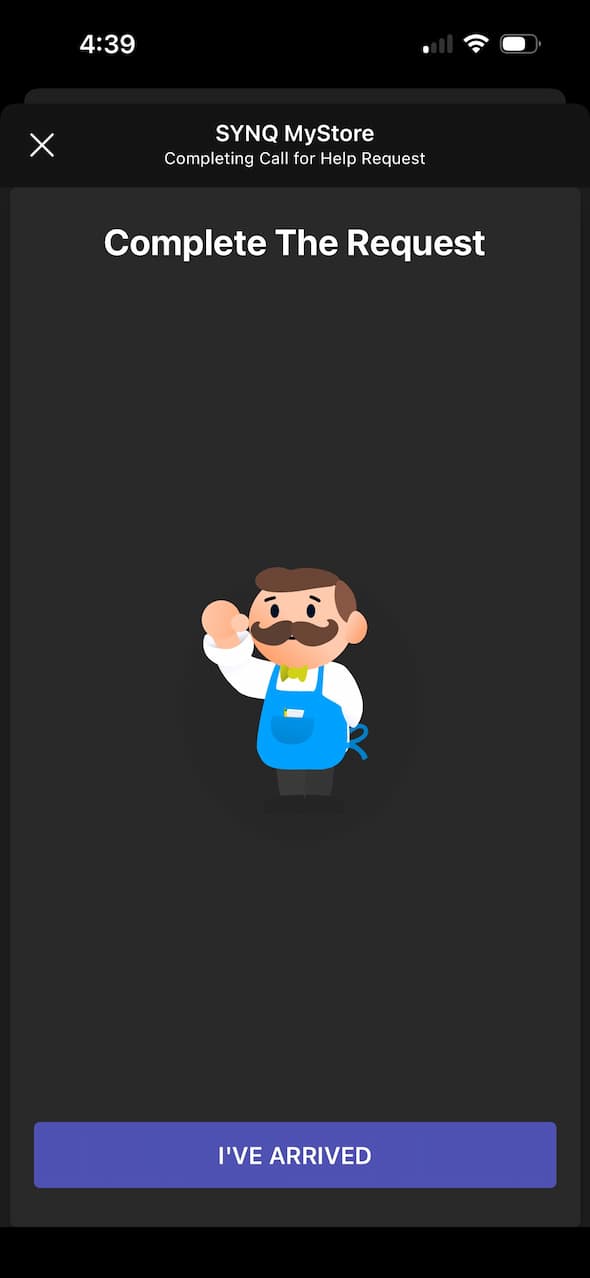
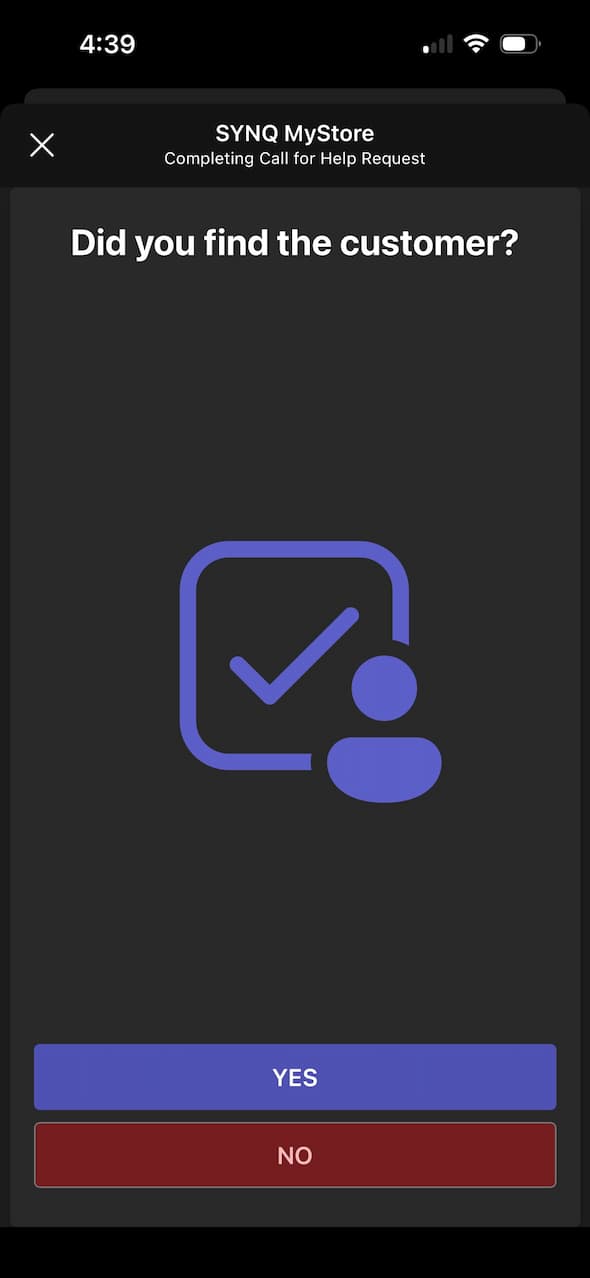
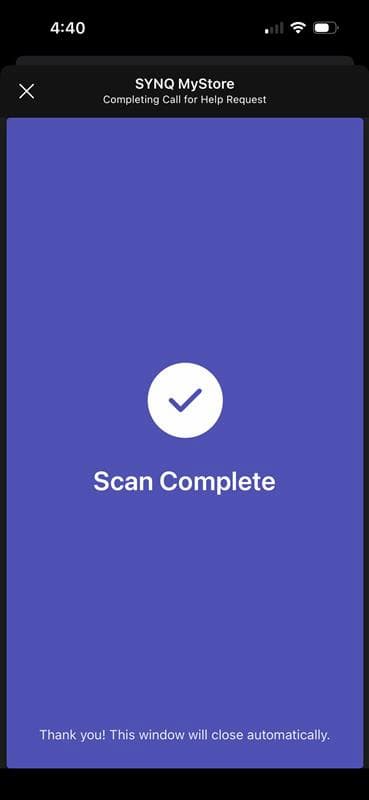
Associate Experience
The following images show the associate experience of scan to complete in Microsoft Teams:
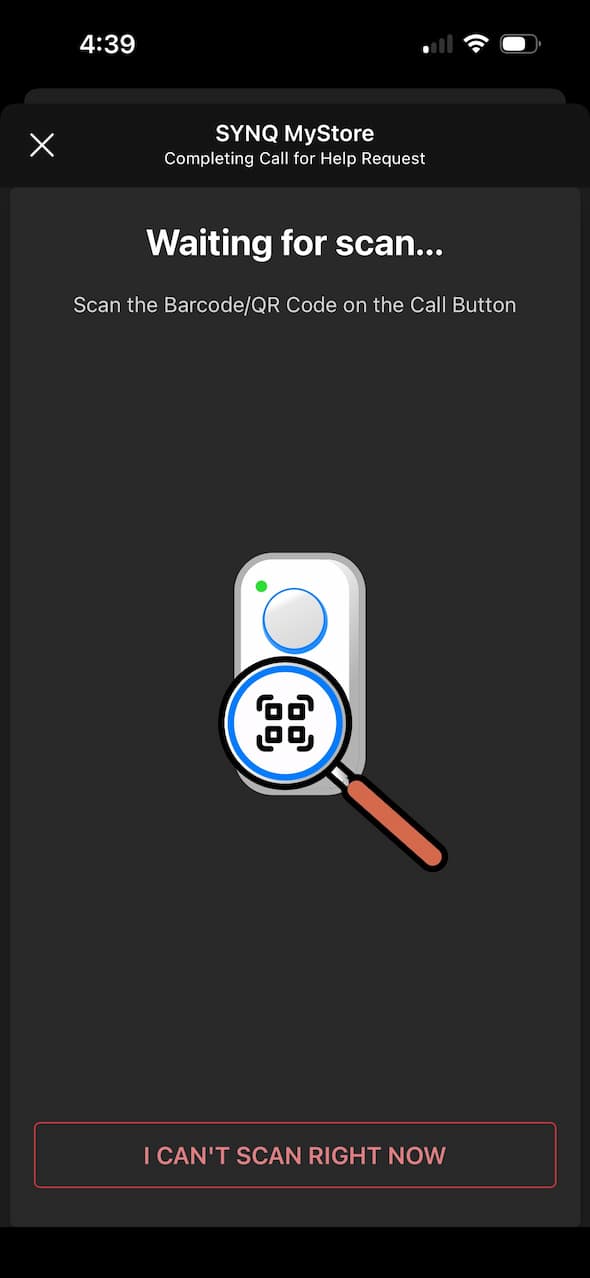
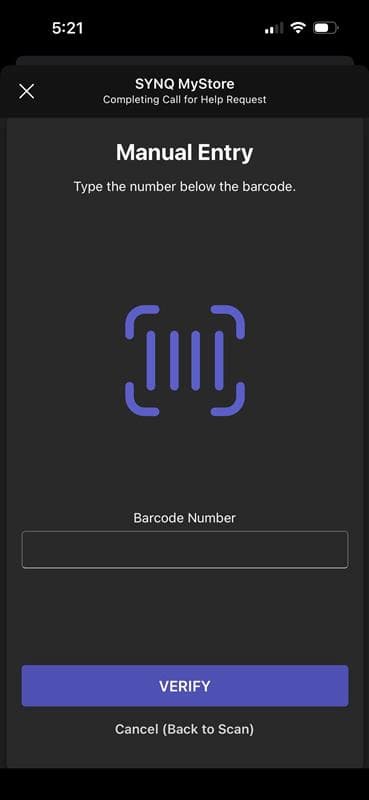
In the event that the associate responding does not possess a scanner enabled device, there is the option for them to manually enter an alphanumeric code printed below the barcode rather than scanning.
Configuration
To enable scan to complete:
- Sign into MyStore.
- Select Call for Help.
- Select Settings.
- Scroll down to Call for Help Displays, Call for Help Buttons, or Call for Help Dispatch Boards.
- Click the ⋮ menu on the desired button or display and select Edit
- Check the Require Scan to Complete checkbox to enable scan to complete.
- Click Update.
When enabled, scan to complete replaces outcomes.
Scan to complete is only supported for call buttons and displays that have prompts with the Staff Action set to Claim & On the Way or On the Way.
Scan to complete is only supported on Microsoft Teams and Zebra Workcloud Sync.